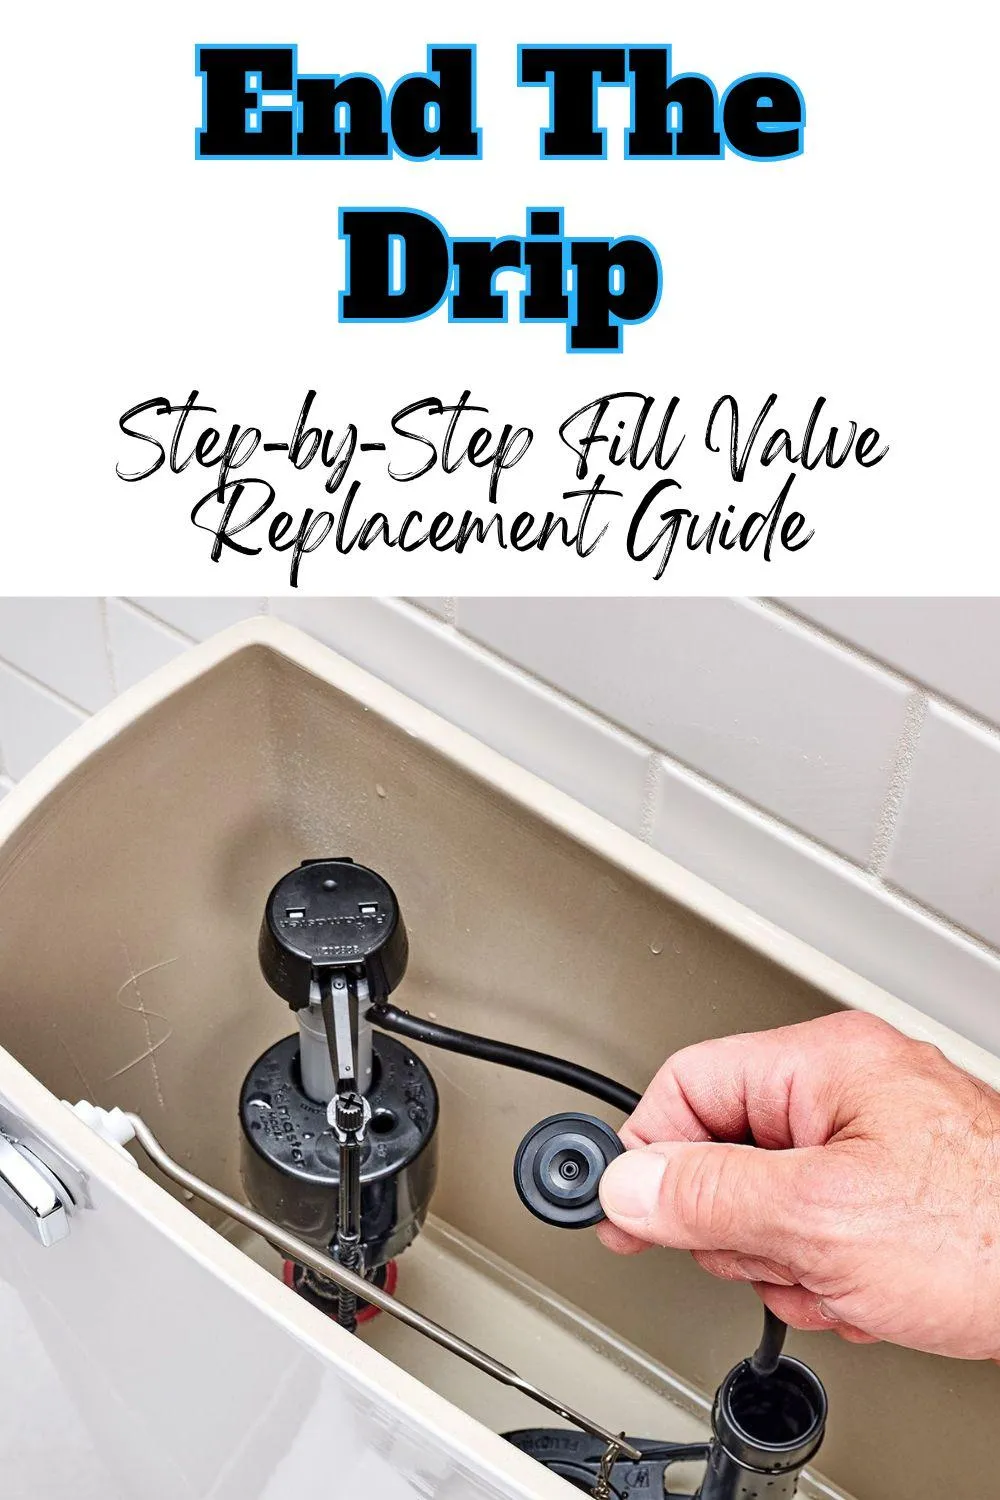
Quick DIY Fix for a Running Toilet: Replace the Fill Valve
"Transform your bathroom woes with our quick DIY fix! Learn how to replace the fill valve and stop your running toilet in just a few simple steps." - Appliance Boss
Introduction:
A running toilet is more than just an annoyance; it's a signal that something isn't functioning correctly within your plumbing system. This persistent sound of water trickling into the bowl can be a symptom of several underlying issues, each necessitating a different approach for resolution. Understanding why your toilet is running is the first step toward an effective repair.

The Importance of Fixing a Running Toilet
Environmental Impact: Conserving Water
Every drop counts. A running toilet can waste a significant amount of water, sometimes hundreds of gallons a day. This not only strains local water resources but also contributes to higher water usage overall. By fixing your toilet, you help conserve this precious resource.
Financial Savings: Lowering Your Water Bill
Water isn't free, and an unchecked running toilet can lead to a noticeable increase in your monthly utility bill. By addressing the issue promptly, you can save money that would otherwise be quite literally going down the drain.
Preventing Further Damage: Avoiding Costly Repairs
Ignoring a running toilet can lead to more severe problems, such as water damage to your bathroom floor or walls, which can be expensive to repair. Early intervention helps prevent these costly complications.
Common Causes of a Running Toilet
Worn Out Fill Valve
The fill valve controls the water that refills the toilet tank after a flush. Over time, this component can wear out or become misaligned, causing continuous water flow.
Flapper Chain Issues
The chain that connects the flush handle to the flapper can sometimes get tangled or break, preventing the flapper from sealing properly and allowing water to leak from the tank to the bowl.
Faulty Flush Valve
A faulty flush valve can also lead to a running toilet. This part, which allows water to exit the tank and enter the bowl during a flush, can become worn or damaged, leading to leaks.
Overflow Tube Problems
The overflow tube helps prevent water from spilling out of the tank. If this tube is set too high or is damaged, it can cause the tank to fill continuously, resulting in a running toilet.
Tools and Materials Needed for the Job
Essential Tools for Replacing a Fill Valve
To replace a fill valve, you'll need a few basic tools: an adjustable wrench, a sponge or towel, a bucket, and possibly pliers. These tools will help you manage the components and ensure a secure fit for the new valve.
Choosing the Right Replacement Fill Valve
Not all fill valves are created equal. When selecting a replacement, consider the make and model of your toilet. Universal fill valves are available, but it's often best to consult your toilet's manufacturer for recommendations.
Safety Gear and Precautions
Safety first. Use gloves to protect your hands from grime and sharp edges, and always ensure the water supply is turned off before beginning any repairs. Keep a towel or sponge handy to soak up any residual water in the tank.
Step-by-Step Guide to Replacing the Fill Valve
Preparing Your Workspace: Safety First
Clear the area around the toilet, ensuring you have plenty of space to work. Lay down towels to catch any water spills and gather all necessary tools and materials.
Turning Off the Water Supply
Locate the shut-off valve, usually found behind the toilet near the floor. Turn it clockwise to stop the flow of water to the tank.
Draining the Toilet Tank
Flush the toilet to drain the water from the tank. Use a sponge or towel to soak up any remaining water, ensuring the tank is as dry as possible before proceeding.
Removing the Old Fill Valve
Disconnect the water supply line from the bottom of the fill valve. Use an adjustable wrench to loosen the lock nut securing the fill valve to the tank, then remove the old valve.
Installing the New Fill Valve
Assembling the New Fill Valve
Follow the manufacturer's instructions to assemble the new fill valve. Ensure all components are securely connected and ready for installation.
Positioning the Fill Valve in the Tank
Place the new fill valve in the tank, ensuring it sits properly in the designated hole. Adjust the height of the valve according to the manufacturer's guidelines.
Securing the Fill Valve with the Lock Nut
From the underside of the tank, screw the lock nut onto the fill valve shank. Tighten it with an adjustable wrench, but be careful not to overtighten, as this can crack the porcelain.
Connecting the Refill Tube
Attach the refill tube to the overflow pipe. This tube directs water into the bowl during the refill process, ensuring the correct water level is maintained.

Adjusting the Fill Valve for Optimal Performance
Setting the Correct Water Level
Adjust the fill valve to set the water level in the tank. The water line should be about an inch below the top of the overflow tube.
Testing the Fill Valve Adjustment
Turn the water supply back on and allow the tank to fill. Observe the water level and adjust the fill valve as needed to ensure proper operation.
Reconnecting the Water Supply
Turning the Water Supply Back On
Slowly turn the shut-off valve counterclockwise to restore the water supply to the tank. Check for any leaks around the connections.
Checking for Leaks
Inspect all connections for signs of leakage. If you notice any drips, tighten the connections slightly until the leaks stop.
Final Adjustments and Tweaks
Make any final adjustments to the fill valve and refill tube. Ensure the toilet flushes correctly and that the tank refills to the proper level.
Testing Your Work
Flushing the Toilet: What to Look For
Flush the toilet several times to ensure everything is working smoothly. The tank should refill quickly and stop at the correct water level.
Ensuring Proper Refill and Shut-Off
Watch the fill valve to make sure it shuts off completely once the tank is full. If the water continues to run, further adjustments may be needed.
Troubleshooting Common Issues
Persistent Running Toilet
If the toilet continues to run after replacing the fill valve, check for other issues such as a damaged flapper or improper chain length.
Weak Flush
A weak flush may indicate a partial blockage or an issue with the flush valve. Ensure all components are functioning properly and the water level is correct.
Water Level Too High or Low
Adjust the fill valve to set the correct water level. If the water level is too high, it can cause overflow; too low, and it may result in a weak flush.
Maintenance Tips to Keep Your Toilet Running Smoothly
Regular Inspections
Perform regular inspections of your toilet's components to catch any issues early. This can prevent small problems from becoming major repairs.
Cleaning the Fill Valve and Other Components
Periodically clean the fill valve and other internal parts to remove mineral deposits and debris. This helps maintain efficient operation.
Replacing Worn Out Parts
Replace worn or damaged parts as soon as you notice them. Keeping your toilet in good repair ensures it functions efficiently and prevents water waste.
When to Call a Professional
Recognizing More Serious Issues
If you encounter more serious issues such as structural damage to the tank or persistent leaks that you can't resolve, it may be time to call a professional plumber.
Understanding Your Limits
Know your limits. While DIY repairs can save money, some problems require the expertise of a trained professional to ensure proper resolution.
DIY Plumbing Safety Tips
Handling Tools Safely
Use tools safely and as intended. Keep them in good condition and store them properly to prevent accidents.
Avoiding Common Mistakes
Common mistakes, such as overtightening connections or using the wrong parts, can cause more harm than good. Follow instructions carefully and double-check your work.
Benefits of Learning Basic DIY Plumbing
Gaining Confidence in Home Repairs
Learning basic DIY plumbing skills can boost your confidence in handling home repairs. You'll be more self-reliant and better equipped to tackle common household issues.
Saving Money on Professional Services
DIY repairs can save you a significant amount of money. By handling minor plumbing issues yourself, you avoid costly service fees.
Enhancing Your Home Maintenance Skills
Developing DIY plumbing skills enhances your overall home maintenance abilities. You'll be able to address a wider range of issues and keep your home in top condition.
Conclusion
Summary of the Quick DIY Fix
Replacing a fill valve is a straightforward DIY fix that can resolve a running toilet. By following the steps outlined above, you can restore your toilet's functionality quickly and efficiently.
Encouragement to Try DIY Plumbing
Don't be intimidated by plumbing repairs. With a little knowledge and the right tools, you can handle many common issues yourself. Give it a try and enjoy the satisfaction of a job well done.
At Zip Appliance and Plumbing Repair, we're here to help you with all your plumbing needs. Visit our website or contact us at (661) 387-2282 for professional assistance.
Additional Resources
Recommended Reading
For further reading, consider books on basic plumbing repairs or DIY home maintenance guides that offer more detailed insights and advanced tips.
Useful Videos and Tutorials
Online videos and tutorials can provide visual guidance and step-by-step instructions. Look for reputable sources with clear explanations and demonstrations.
Where to Find Quality Plumbing Parts and Tools
Purchase quality parts and tools from trusted suppliers. Hardware stores, home improvement centers, and specialized plumbing supply shops offer a range of products to meet your needs.
Reader Engagement
Inviting Comments and Questions
We welcome your comments and questions. Share your experiences with DIY plumbing and ask for advice on any issues you encounter.
Sharing Success Stories and Photos
Have you successfully fixed your running toilet? Share your story and photos with us. Your success can inspire and help others.
Final Thoughts on DIY Plumbing
Empowering Homeowners
DIY plumbing empowers homeowners to take control of their home maintenance. With the right knowledge and tools, you can address many common issues yourself.
Promoting Sustainable Practices
By fixing leaks and making efficient repairs, you contribute to sustainable practices. Conserving water and reducing waste benefits both your wallet and the environment.